Showing posts with label Internet. Show all posts

how to flip text

Posted by Unknown On Thursday, 18 April 2013 0 comments
Hello word this me again to day i brought you a new damn trick about fliping you statu upside down 
Like this ;)

this is the website
http://www.fliptext.org/
READ MORE

get ubuntu guide for free

Posted by Unknown On Saturday, 13 April 2013 0 comments


HELLO world this is yassine again and i'm here to tell you the way to get free ubuntu guide for beginners for free yes for free
first you will need to go to this website http://lockergnome.tradepub.com/free/w_make72/prgm.cgi
then full the free spaces with your infomations and wait to get you ubuntu guide in your Email adresse
and enjoy learning ;) if you are new here just check out older post and hope you enjoy this 
READ MORE

Create custom themes in Gmail with your own photo

Posted by Unknown On Tuesday, 26 February 2013 0 comments
Themes available in gmail are all beautiful and captivating but if you are yet not satisfied with the available themes then you can create custom themes using your own pic in gmail.  To create your own theme follow the steps given below.
  1. Log in to your Gmail account and click on settings.
  2. In the settings page click on themes tab.
  3. In themes scroll down to the end of the page and click on “Create your own theme”.
  4. A new pop up window will open. There you can select your own color combinations for your inbox and a background image for the theme.
  5. When you are done just click on the “save” button and then “close”.
  6. Now you can see your own custom theme in action in your Gmail account.
READ MORE

Some funny pranks to play on your friends PC

Posted by Unknown On Sunday, 24 February 2013 0 comments
If you love pranks then you will love this one .
funny computer prank
1. Mouse Move -This program will run hidden and move the users mouse to random positions.
Download Mouse Move
2. MouseClicks – With this app you can disable left, right or both mouse clicks for random seconds.
Download MouseClicks
3. Rotate -Rotate will rotate your desktop in any random positions.
Download Rotate
4. Random Bumper –This will run hidden on the victim’s computer and will make any random funny sounds from background. Really funny app.
Download Random Bumper
5. DownHoax – This is a great prank makes it appear as though an “unwanted” file is being downloaded from the Internet. DownHoax randomly chooses a site from its internal database of “undesirables” and proceeds to simulate downloading an equally distasteful file.
Download DownHoax
READ MORE

How to Always Start Any Browser in Private Browsing Mode

Posted by Unknown On 0 comments
private-browsing-in-all-browsers

Private browsing mode doesn’t offer complete privacy, but it does prevent your browser from saving your history, searches, cookies, and other private data between browsing sessions. You can have your browser always start in private-browsing mode if you prefer it. Most people won’t want to use private-browsing mode permanently. You will have to log into the websites you use each time you open your browser, as your browser won’t save the cookies that keep your login state.

Google Chrome

To activate Google Chrome’s incognito mode by default, you will need to add a command-line option to its shortcut.
First, locate the shortcut you use to launch Google Chrome – either on your desktop, Start menu, or taskbar – and right-click it. Select Properties in the menu that appears.
If you are using using a taskbar shortcut on Windows 7 or 8, you will have to right-click the Google Chrome icon on your taskbar, right-click Google Chrome in the list, and select Properties.

Add -incognito (that’s a space character, a dash, and then the word incognito) to the end of the Target box. Click OK after adding this option.

Google Chrome will now start in incognito mode when you launch it via this shortcut. If you use other shortcuts to launch Google Chrome, you will need to modify them, too.

Mozilla Firefox

Firefox allows you to automatically enable private-browsing mode via its options window. Click the Firefox menu button and select Options to open it.

Click the Privacy icon and select “Never remember history.” Firefox will now use the same settings it uses in private-browsing mode, although it won’t display its normal private-browsing interface.

Internet Explorer

You will need to add a command-line option to your Internet Explorer shortcuts to activate InPrivate Browsing by default.
Locate the shortcut you use to launch Internet Explorer, right-click it, and select Properties. On Windows 7 or 8, right-click the Internet Explorer icon on your taskbar, right-click Internet Explorer, and select Properties.

Add -private to the end of the Target box (that’s a space, one dash, and then the word private). Click OK.

Internet Explorer will now start with InPrivate Browsing enabled when you launch it via this shortcut. If you use other shortcuts to launch Internet Explorer, you will need to modify each one.

Opera

Opera also has a command-line option to enable private-browsing mode.
As with the other browsers here, locate your Opera shortcut, right-click it, and select Properties. On the Windows 7 or 8 taskbar, right-click the Opera icon, right-click the name Opera, and then click Properties.

Add -newprivatetab to the end of the Target field (that’s a space, one dash, and then newprivatetab). Click OK.

Opera will now open a private-browsing tab whenever you launch the shortcut. Note that Opera has per-tab private-browsing settings, so this tweak will only open a private-browsing tab when you launch Opera. You will have to open new “private tabs” instead of normal tabs while using Opera to continue using private-browsing mode.

Remember that your browser won’t be able to save login states, websites preferences, or any other type of data if you do this. This can be both a blessing and a curse.
If you want to undo any of these changes, you can modify the shortcuts against and remove the option you added. On Firefox, all you need to do is select the “Remember history” option.

READ MORE

How to Use Spoon.net to Test Apps on a Virtual Cloud Computer

Posted by Unknown On Wednesday, 20 February 2013 0 comments

spoon_title


The idea of running server-side apps is nothing new, but it’s not really a concept that is readily associated with everyday applications such as OpenOffice. There are various online apps available – like Google Docs – but Spoon.net gives you access to a wider range of familiar titles that can be run in the cloud.
Spoon.net differs from other similar services that allow you to work with apps online. Here, rather than working with apps that have been re-written or specially designed for cloud usage, you are able to choose from programs you know and love – everything from web browsers and image editors to media players and games.

The service is not entirely cloud-based; it is not possible to run all of these apps in your web browser. Instead you will need to download a copy of the Spoon.net console which you can grab free of charge from www.spoon.net.
To download the software you will need to provide your name and email address and choose a password. These serve as the details for your Spoon.net account which can be used to access the same apps on different machines.

Online App Library

Once you log into your account you can access the app through a system tray icon. This works much like Start menu in pre-8 versions of Windows and all of the available apps are neatly categorized so they are easy to find.

As you use apps, they are added to your list of recently accessed programs so you don’t have to click through endless menus to launch them again. There is also a search option that lets you track down apps you may want to use – just start typing and results will be displayed on the fly.

Apps can take a little while to load, but this is largely dependent on the speed of your internet connection. Remember, these are full applications, not cut-down versions that have been specially designed for ‘streaming’ in this way. Should you use an app more than once, you will find that it has been buffered at that subsequent launches are noticeably faster.

The Silver Lining

The fact that these are full apps means that not only are you not missing out on any features, but also that you are able to interact with cloud apps in exactly the same way as those you have installed on your PC. This means that you can Alt-Tab your way between apps, resize and move windows – basically anything you may want to do with a program.
Visit your account on the web and you have another way in which to browse through the list of online titles. In many respects this is actually an easier way to look through the collection, particularly if you want to read descriptions and compare different apps. However, there is another, arguably more interesting side to things.

Play in the Sandbox

The ability to set up sandboxed machines with Spoon.net provides many possibilities. This is an option that can only be accessed through the website, not through the console software, and you will find it by clicking the ‘Fork a sandbox’ link.
There are a number of pre-configured sandboxes for you to work with – remote access tools, web browser, email utilities and many more – and using these is a great way to try out software without having to consider security.

So what could you use Spoon for? The apps are updated on a frequently so it gives you a great way to try out new releases without having to worry about the potential side-effects they could have on your system. Being able to work with older versions of a web browser is something that might come in handy from time to time.
The fact that your cloud-based system is essentially sandboxed means that you are free to do things that you might not ordinarily consider safe on your mission-critical PC.

Of course, the free version of Spoon doesn’t let you play with the big guns. If you want to be able to work with the likes of Microsoft Office or Adobe Creative Suite, you will have to part with some cash for a Spoon Studio license.
You can use an isolated browser to visit some of those sites that you might not trust, and web developers can check to see how their sites look in different browsers – including mobile versions – without having to access countless platforms or install numerous programs. There is also the fact that it’s just pretty cool.
READ MORE

Tip: Get the new look Google Bar now

Posted by Unknown On Monday, 18 February 2013 0 comments


As announced a couple of days ago, Google has begun rolling out a new bar for switching between services to replace the old black bar. But who wants to wait for a slow trickle of new features to reach you when you can get the new bar right now? Here’s how to do it,
1) Firstly download Edit This Cookie for Google Chrome (sorry to users of other browsers) from here.
2) Go to google.com.au and then right click anywhere on the page. Select Edit Cookies from the drop down menu.
3) Select the PREF cookie and then in the spot called “Value” replace the code with:
ID=03fd476a699d6487:U=88e8716486ff1e5d:FF=0:LD=en:CR=2:TM=1322688084:LM=1322688085:S=McEsyvcXKMiVfGds
4) Now we’re almost done. All you need to do now is save the settings by clicking “Submit Cookie Changes” at the bottom of the page.
5) Now go to any big Google service and you’ll see the new bar.
I personally don’t like the bar as much as I liked the old bar, but Google is going to force it on all users so you might as well get it now and start getting used to it.
READ MORE

5 iGoogle Alternatives You Should Consider

Posted by Unknown On 0 comments


People love their iGoogle, but Google has announced that it will be killed off the personalised portal on November 1 next year. Why? Well, they are killing it so they can focus “our energy on the products with the biggest potential to make a difference.” Fans are screaming for it to survive, but unless Google managed to change their minds, you have around a year to find an alternative. We have found five that could replace it. You can view them after the jump.

Netvibes

Remember them? This was, back then, considered the darling of personalised homepages winning several awards such as CNET’s Webware 100 and TechCrunch’s Crunchies in 2007. But then, it fell back into obscurity. But if you want to retain your iGoogle experience – with all the feeds, widgets and themes – then you should consider Netvibes.
There are some additional features that sets Netvibes apart from iGoogle like customising the page’s column layout, and a ‘Reader’ mode that makes it more like Google Reader than iGoogle.
It has become more ‘business-orientated’, however it does have a free version to create a personal ‘page’. It also, like iGoogle, has no shortage of applications. There are nearly 150,000 apps for Netvibes, including many for Google’s services like News and Calendar (though, not officially made by them).
- netvibes.com

uStart

Another iGoogle alternative, and another one from France. uStart is similar with iGoogle mainly because of the widgets, tabs and themes. You can also further customise a theme with custom skins (you define the background colours and images, it doesn’t offer any of its own). It also has an RSS Reader, but like Netvibes, these cannot be separated – they have to widgets in a tab page.
It’s design is very rough (Netvibes has a far more better design), and the occasional spelling differences (it managed to use two versions of customise, and spelt useful as “usefull”) but it does the job.
- ustart.org

Protopage

Found this after one person I follow on Twitter mentioned it, and this is pretty much the most customisable ‘personalised homepage’ as you get it. While there are no preset themes, you can customise the colour, the background, the size of the widgets (you can have widgets occupy the entire page). You can customise the columns each tabs have, and you can even make the widgets be in any location on the page with the “Free positioning” layout.
However, it is pretty basic in terms of apps. It, like uStart, can add RSS feeds but doesn’t have much in terms of third-party apps that iGoogle and Netvibes offer. The design is reminiscent of the early days of Web 2.0, but if you require the most basic functions then this will pretty much satisfy.
- protopage.com

Feedly

Alright, we’re going to go a bit different here. Some people would have used iGoogle to keep up to date with the latest news that was happening when they opened their browser. Feedly is a plugin for Firefox, Safari and Chrome that is, basically, a pretty feed reader. It links to Google Reader – which makes it easy for you to transfer the RSS feeds from iGoogle – and does what other web feed readers don’t: it organises it like a magazine. You can switch to a standard feed reader mode, but the magazine-like view does make it easier to see what you should look at. There are many sharing options – email, Twitter, Facebook and Tumblr to name a few.
The design, however, is the biggest selling point. It is beautiful, and I highly suggest that if you use iGoogle to simply look up the latest news, go to this first before you try the other iGoogle clones. When I first used it, I instantly fell in love with it.
- feedly.com

MyFav.es

Again, going to a different direction here. iGoogle allowed you to have widgets and be kept up-to-date with the news. However, more and more people are adopting pages that quickly take them to the page because they can’t seem to be bothered with a bookmarks bar.. Your browsers are adopting a “start page” by basing it on your favourite pages – but if you happen to be on multiple computers or browsers, then you need a page that will be consistent. Enter MyFav.es.
It basically presents the sites that you often frequently visit (of course, based on what you add, it doesn’t track anything). You save that page as your homepage on your computer and/or browsers, and you’re done.
Yes, it’s a very different direction from iGoogle – mainly because it doesn’t have widgets and it doesn’t have feeds. But if you get your news mostly from Facebook or Twitter, this is more likely to cut down the time for you to get on those sites.
- myfav.es
READ MORE

How to Block Unwanted Website on your PC

Posted by Unknown On 0 comments

Now internet has became a very important part in everyone's life. Internet gives us the good things and as well as the bad things. So, we can block this kind of websites from our computers permanently or for a particular time period. We can block these websites by using the software called “FocalFilter”. You can install this software on your computer and follow the below mentioned steps to block those kinds of websites for a particular time period.

How to Block Unwanted Website on your PC


Note: Microsoft’s.NET same work needs to operate this software. And make sure this is installed in your computer.

Install the FocalFilter software and click on Edit my site list.

A window will appear, in that window type the website addresses which you want to block. And then click on Save.

After that another window will display, in that, click on popup menu (near to “Block four”) and select the timeThen click on Block my site list.
READ MORE

5 sites help you to send anonymous emails

Posted by Unknown On Tuesday, 12 February 2013 0 comments

When you want to report something illegal or simply not willing to know your identity as the sender of an email specific, you definitely will be looking for a way to send your e-while ensuring no identifiable, especially that with some modern techniques can know the identity of sender e-mail allby analyzing the header 
5 مواقع تساعدك على إرسال إيميلات مجهولة الهوية

  Our topic today will provide several services to help you send anonymous emails where the addressee will not be able to determine the identity of the sender of the e-mail address (your identity), as he will not be able to determine your place Omarafh any other information about you By following this explanation:

  Deadfake: موقع


Deadfake


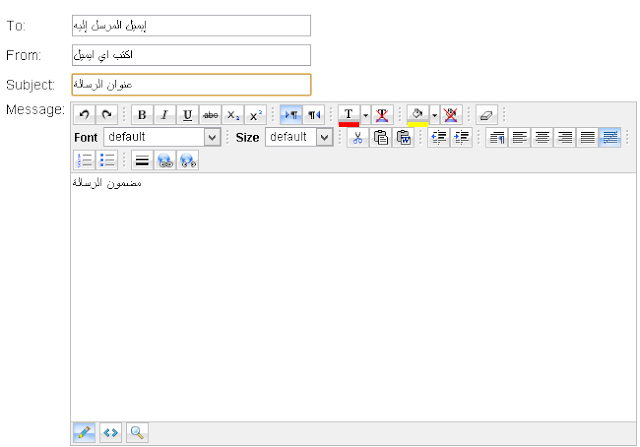
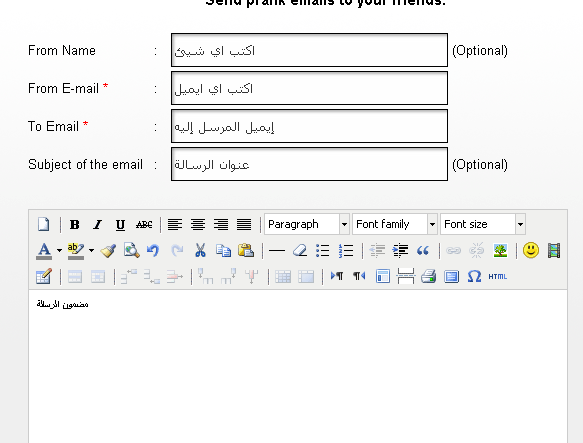
deadfake is a very simple site Kdlaihtaj to explain many, simply login site link beneath it was down a little to the bottom where you will find that the site asks you to enter some information (To) where will enter the e-mail address that you want to contact him, (From) Type any false email addressfor example (amine@raghib.me). As in (Subject :) Here you write the title of the message or topic has been initiated in the big box writing the content of the message was to enter a CAPTCHA code before sending your message.
Site
Deadfake

 5ymail :موقع


5ymail


  Another site sends Anbox and does not need the registration, is also characteristic of the site from others that you can raise and send files attached to the consignee, either way of dealing with the site is similar to the first Active, enough entering the requested data where the site will be sent anonymous.
Site:
: 5ymail

  Anonymailer: موقع 

 anonymailer


In case if a lot pressure on both sites above you can use of anonymailer site is also no different than previously reported in terms of the method of sending electronic messages, in addition to that he does not need to register and you can send Macit of e-mails.
Site
: anonymailer

موقع  sharpmail

Site needs to register before you send anonymous letters, he also characterized quickly send mails, enough after login link clicking on the word register was launched in data entry required of you and follow the steps activate the account, then go back to the site and click on the login top far right, whereyou must enter a name user password in order to access your control Panel and send your message by clicking on the anonymouse email top left.
Site:
sharpmail

 silentsender :  موقع

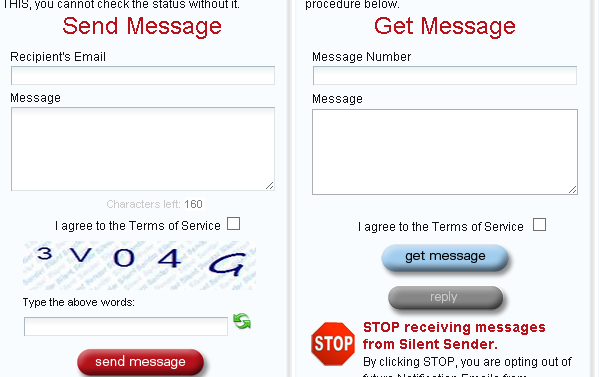
Is another site in this post, but also different from the location listed by in this post, because it after completing writing the message in the site silentsender and send the consignee Saisalh notice that email has a link but encrypted and to be able to decrypt it shall enter on the linksite and enter the tracking code Saisalh in a letter to the postal account, so the electronic messages will be encrypted and protected in addition to the consignee can not identify
I hope that sites listed by in this post has liked and forget our other sites of discovery

...

READ MORE

get fake emails in 1sec

Posted by Unknown On Saturday, 26 January 2013 0 comments


hello people !!!!!! we all faced that awkward moment when you  want to sign in a website but they tall you that your email is allready in the database of the website !!! probleme !!! so what you need to create a new email to sign in No No No No ...
you can create a fake email to sign in the website and all your mails well get dliver to your real email all that by use this website in 1 sec you can get you fake email and use it have fun
READ MORE

Browser Slow? How to Make Google Chrome Fast Again

Posted by Unknown On Friday, 18 January 2013 0 comments

Browser Slow? How to Make Google Chrome Fast Again

Add caption
Have you noticed your usually speedy Google Chrome browser slowing down, or even crashing on you? Unnecessary plugins, extensions, and even browsing data can slow your browser down to a crawl, or make it crash. Here’s how to fix it.
In this article, we’ll show you how to disable plugins and extensions and clear browsing data to speed up Chrome and prevent it from crashing on you.

if you use Firefox this a simple tips for you

Disable Plugins

By default, when you install Google Chrome, many unnecessary plugins are installed and enabled. Plugins help Chrome process special types of content, such as Flash, Java, Silverlight, or Windows Media files, but most of them aren’t even important to your daily browsing. Plugins can slow down the performance of Chrome, but you can disable plugins you are not using. To do this, type “about:plugins” (without the quotes) in the address bar of Chrome and press Enter.
NOTE: You can safely disable every single plugin, but you may want to keep Flash enabled, as a lot of sites use Flash to display menus, show videos, etc. Also, if you watch Netflix in Chrome, you need to keep the Silverlight plugin enabled. You can always enable a plugin again if you need to.
Add caption
A list of installed plugins displays on the current tab. Scroll through the list and click the Disable link for each plugin you feel you don’t need.
NOTE: Plugins cannot be deleted or uninstalled, only disabled. An exception would be a plugin that was installed as part of an extension and you uninstall the extension. Then, the plugin is automatically removed.
Add caption
Disabled plugins turn gray in the list, and the Disable link for each disabled plugin becomes an Enable link, allowing you to enable the plugin again, if desired.
Add caption

Disable Extensions

Extensions are small programs available in the Chrome Web Store that add extra features and functionality to Chrome. They can be very useful, but if you end up with a lot of extensions installed, the browser’s speed may be negatively affected. You can easily disable extensions without uninstalling them to gain some speed. Some extensions install a button on Chrome’s address bar, and those can be quickly disabled by right-clicking on them and choosing Uninstall from the menu.
Add caption
You can also install apps in Chrome, that are accessible on the New Tab page. These can also be disabled.
Add caption
To access your list of installed extensions and apps, click the wrench icon on the toolbar and select Tools -> Extensions from the drop-down menu. You can uninstall extensions with buttons without accessing this list, but you might be surprised that some extensions are in the list that don’t have a button.
Add caption
To disable an extension, click the Enabled check box to the right of the extension’s title in the list so there is no check mark in the box.
Add caption
The Enabled check box becomes an Enable check box, allowing you to re-enable the extension at any time.
NOTE: You can also easily remove any extensions or apps you don’t want anymore by clicking the trash can icon to the right of the Enabled check box.
Add caption
Notice that there are a lot less extensions on our toolbar now.
Add caption

Clear Browsing Data

As you browse the web, Chrome’s history database collects URLs and cached texts for websites you’ve visited, your download history, cookies, and other website and plugin data. While the point of the history and cache database are to speed up your computer by caching things locally instead of having to download every time, sometimes the history database can become very large and may slow down Chrome.
NOTE: You shouldn’t clear your history regularly for speed purposes, as that defeats the purpose of a local cache. You can certainly clear it for privacy reasons though.
There are several ways to clear your browsing history, including clearing your entire history and clearing the history for specific sites.

Clear Your Entire Browsing History

To clear your entire browsing history, click the wrench icon on the toolbar and select Tools -> Clear browsing data from the drop-down menu.
NOTE: Clearing your entire browsing history prevents matches from displaying when you start typing URLs in the address bar.
Add caption
In the Clear browsing data dialog, select the items you want to clear and select a time range from the drop-down list. Click Clear browsing data to clear the selected data.
Add caption
When the Clear browsing data dialog closes, the Settings tab opens. To close it, click the red X button on the tab.
Add caption

Clear Specific Items from Your Browsing History

If you want to delete the history for only specific webpages, click the wrench icon on the toolbar and select History from the drop-down menu.
Add caption
Move your mouse over a webpage you want to remove from the history list and select the check box that displays. Once you have selected all the webpages you want to remove, click Remove selected items.
Add caption
A confirmation dialog box displays. Click OK if you are sure you want to remove the webpages from the history list.
Add caption
To close the History tab, click the red X button on the tab.
Add caption

Clear Your Browsing History from the New Tab Page

The New Tab page displays thumbnails for the websites you visit most. You can clear your browsing history by removing these thumbnails from the New Tab page.
To remove a webpage from the New Tab page, move your mouse over the thumbnail for the site and click the X that displays in the upper, right corner of the thumbnail.
NOTE: You can reset the New Tab page to blank thumbnails by clearing your entire browsing history, as mentioned earlier.
Add caption
You can also remove a thumbnail from the New Tab page, by dragging it to the Remove from Chrome trash can, which only displays once you start dragging a thumbnail.
Add caption

Clear Your Browsing History Automatically when Chrome Exits

Earlier in this article, we recommended disabling extensions you don’t use to speed up Chrome. However, there is one extension that might be useful. The Click&Clean extension allows you to clear browsing data automatically when you close Chrome.
To install Click&Clean, click the link above and then click the Add to Chrome button on the webpage for the extension.
Add caption
A confirmation dialog box displays to make sure you want to install the extension. It also tells you what the extension can access. Click Add to continue with the installation.
Add caption
Once Click&Clean has been installed, a notification displays, pointing to the new button on the Chrome toolbar.
Add caption
When you click the Click&Clean button, the Main menu displays. There are many tools available in this extension for maintaining Chrome and your computer. The gray buttons in the middle of the menu provide access to more tools.
To configure Click&Clean to clear browsing data when Chrome exits, click the Options button on the Main menu.
Add caption
To select which types of browsing data to clear when you close Chrome, click the Clear Private Data when Browser Closes tab on the left. Click the plus sign to the left of Chrome in the list on the right. Check the items you want automatically cleared when you close Chrome.
For more information about the options available in Click&Clean, see the Help webpage.
Add caption
Happy speedy browsing!
READ MORE

Blogger news